Thankfully, there are a few solutions that you can apply to fix this issue. Sometimes, these problems may creep up because of corrupt system files, or faulty memory files. However, this problem isn’t something big of a deal. You will possibly be able to fix the issue using any one of the fixes mentioned in this guide. Having said that, let us take a straight drive into the article itself.
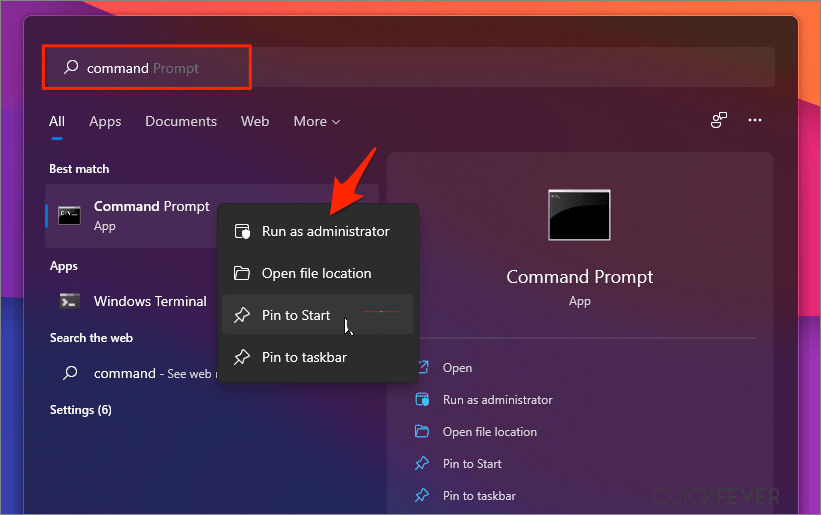
1. Use CMD to Update Group Policies
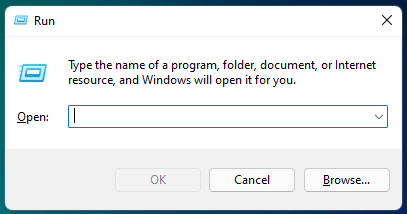
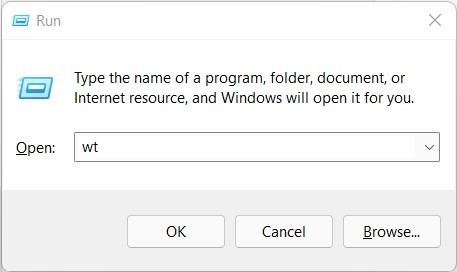
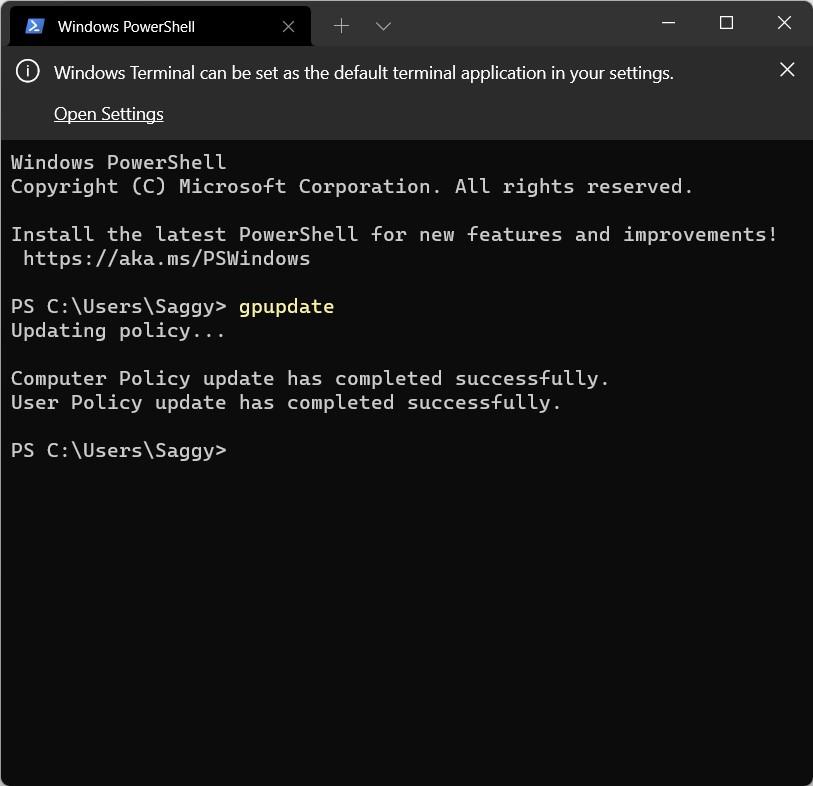
If the auto-restart issue has surfaced on your Windows 11 machine right after you have updated it from Windows 10, then it could be because of incorrectly migrated group policies. The first thing you should do in this scenario is to ensure the group policies are up to date. This can be done using the command prompt and following the below-mentioned steps. The point to note here is a Windows update would automatically update the group policies once you switch over from Windows 10 to Windows 11. But this manual process would speed up the update procedure.
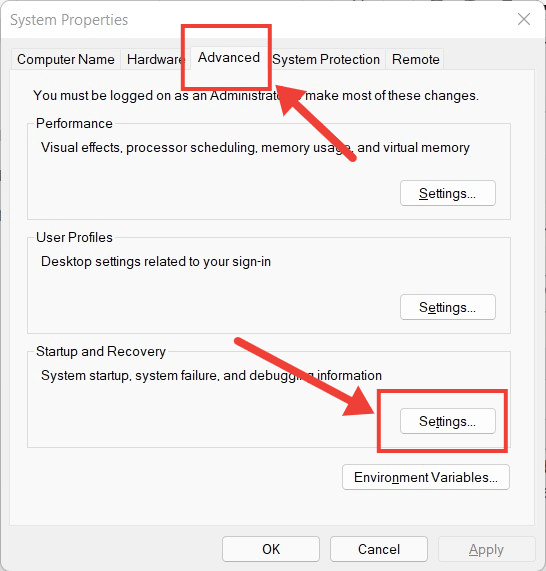
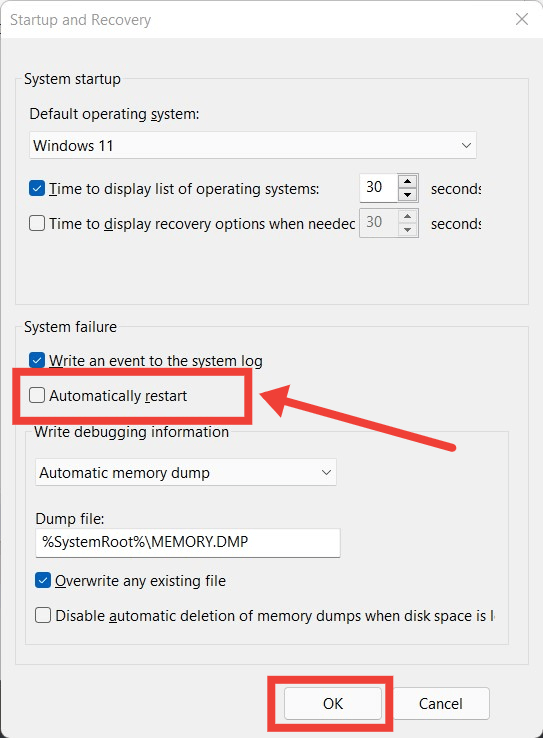
2. Disable Automatic Restart
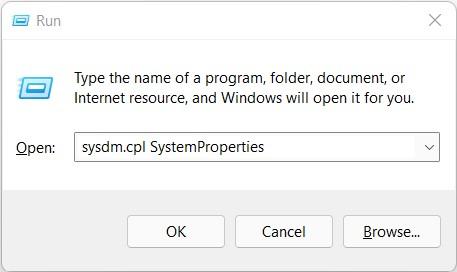
There is a system property called ‘Automatic Restart’ that will restart your PC automatically whenever it encounters an error, system bug, or in an event of system failure. If this option is left enabled, when your Windows 11 PC faces any issue, it will automatically cause the system to restart. Here’s how to disable it.
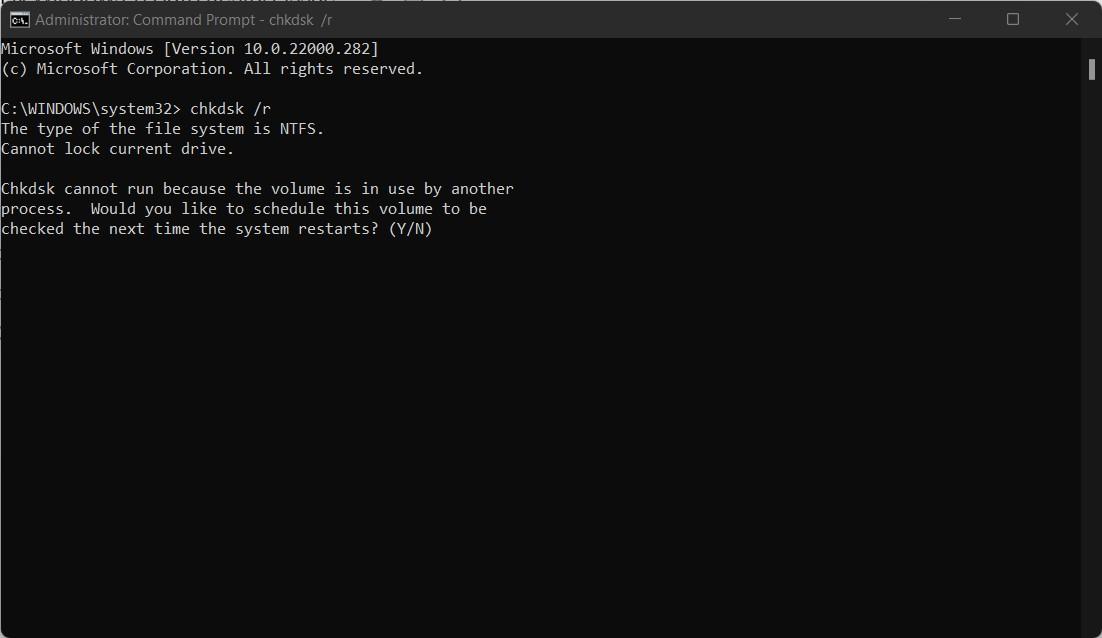
3. Perform a CHKDSK scan
Corrupt storage sectors could very well be the reason behind such automatic restart issues. Faulty storage sectors prevent your operating system from accessing important components required to smoothly run the PC. Here are the steps:
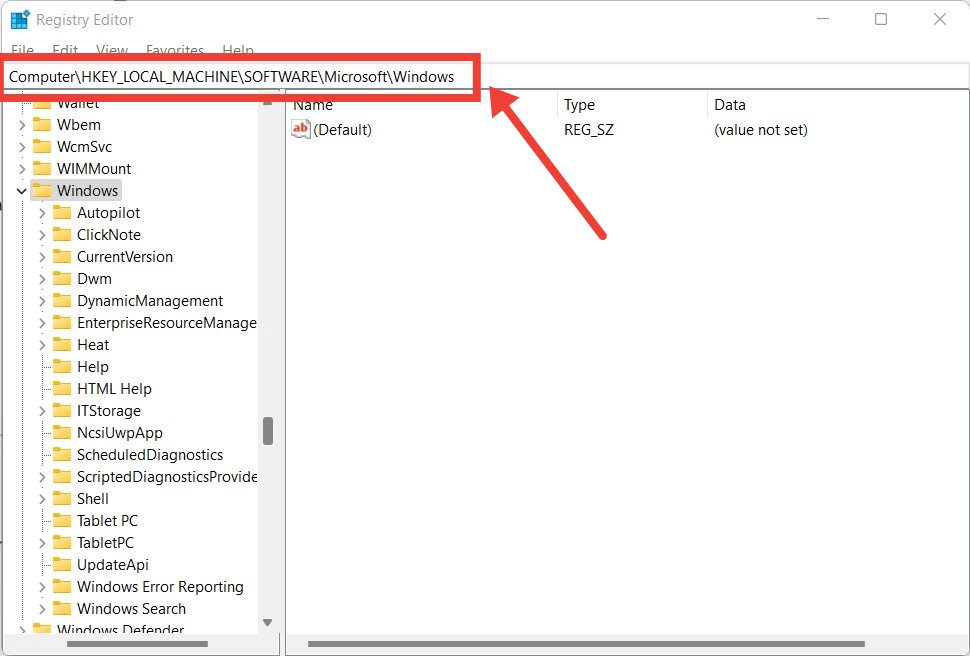
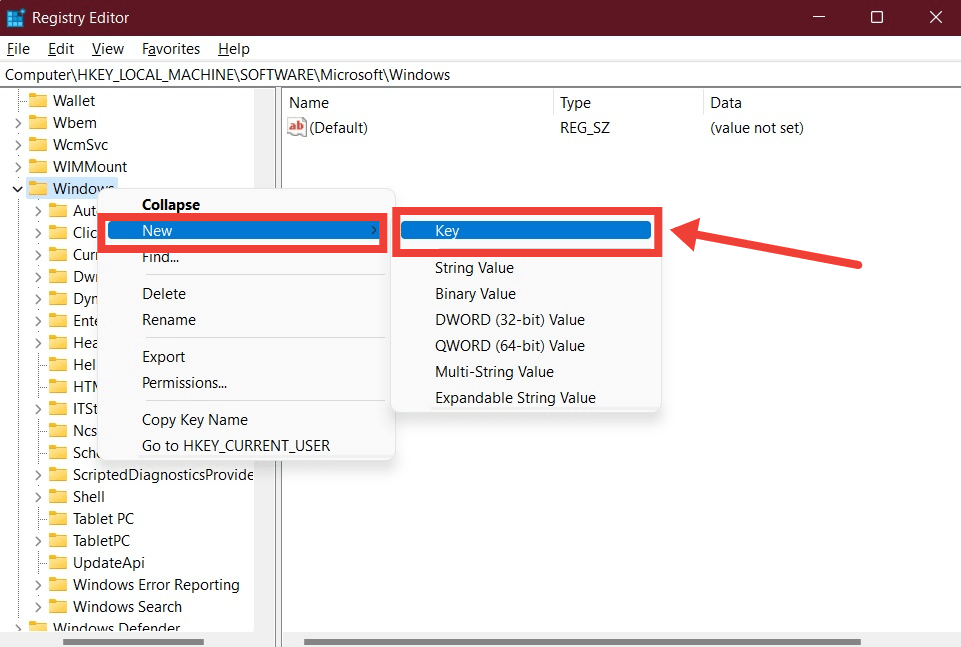
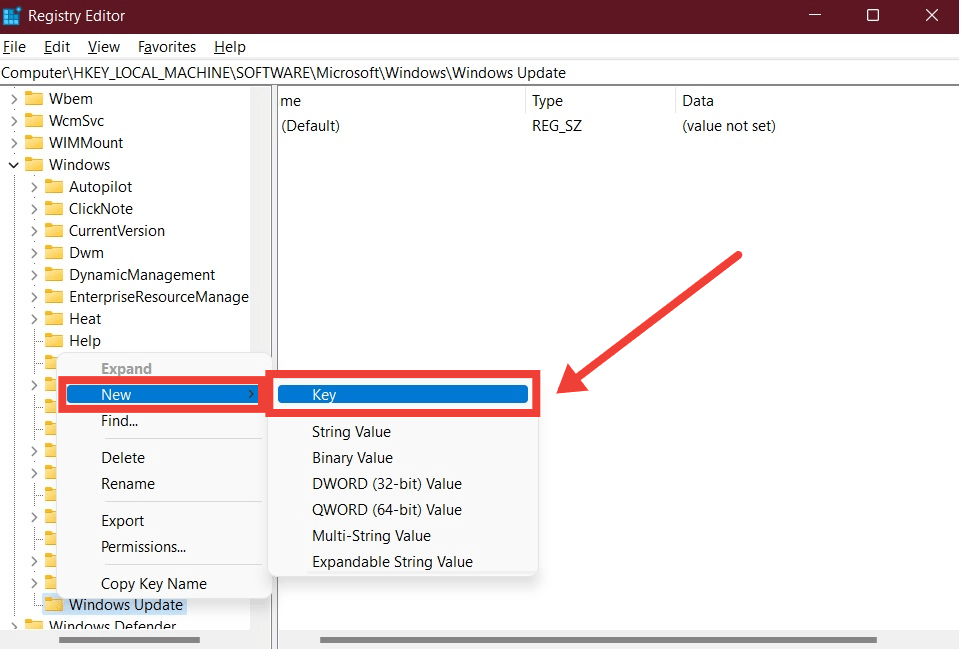
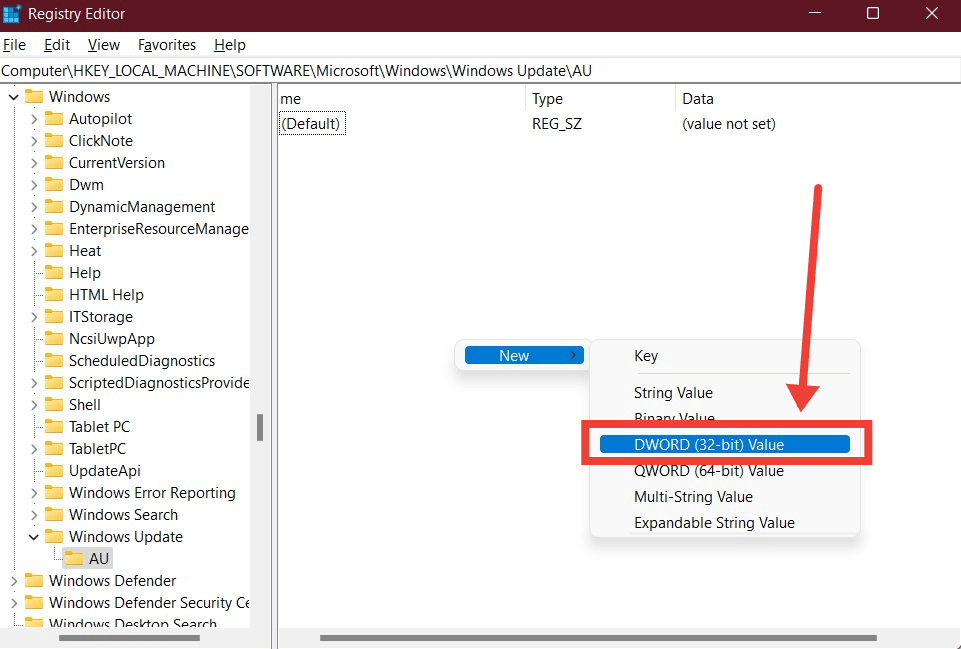
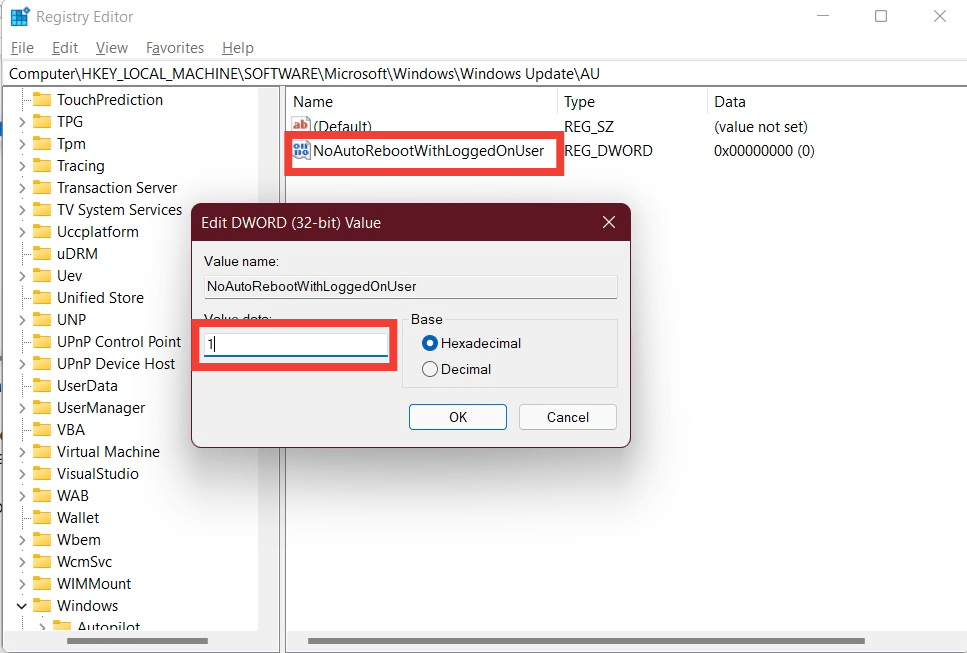
4. Stop Auto-Reboot using a Registry Editor
If left unchanged, Windows update would restart your PC in between your tasks. So, it is advisable that you stop the auto-reboot feature on your Windows 11 PC. For this, you can make use of the registry editor.
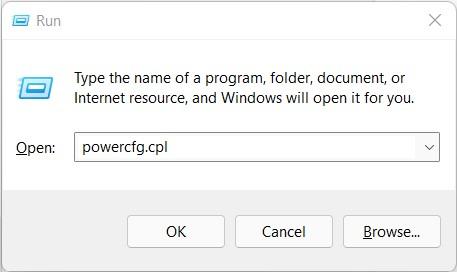
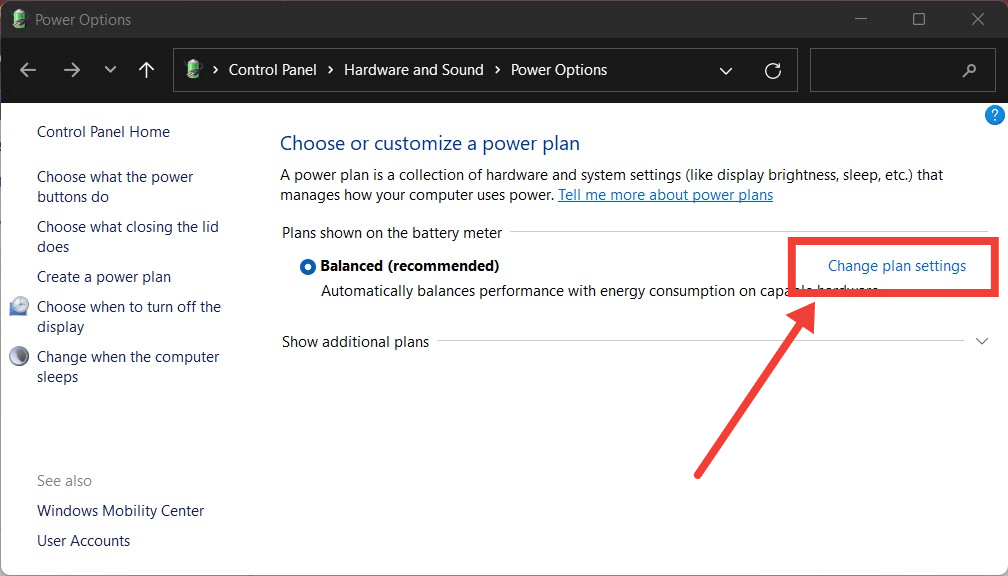
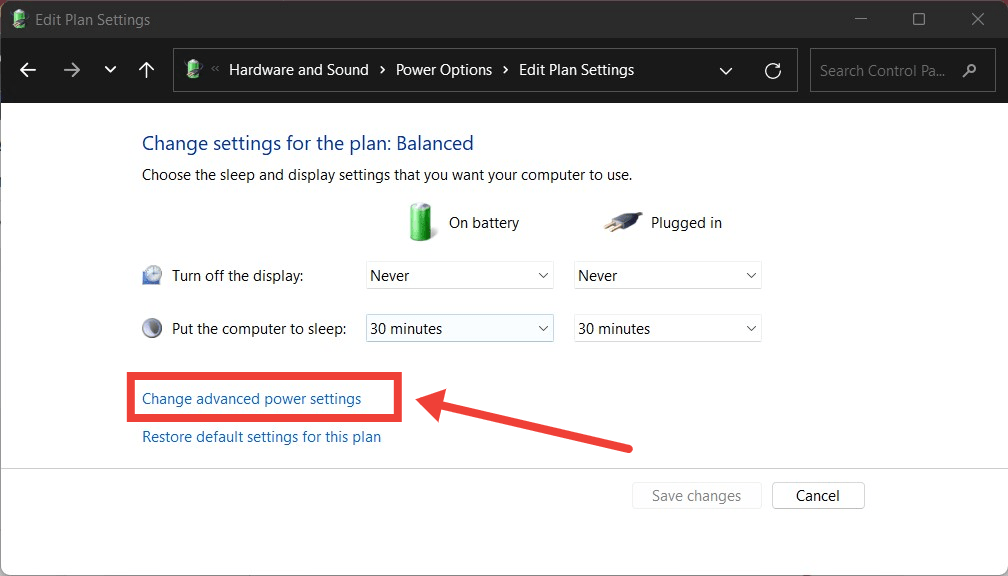
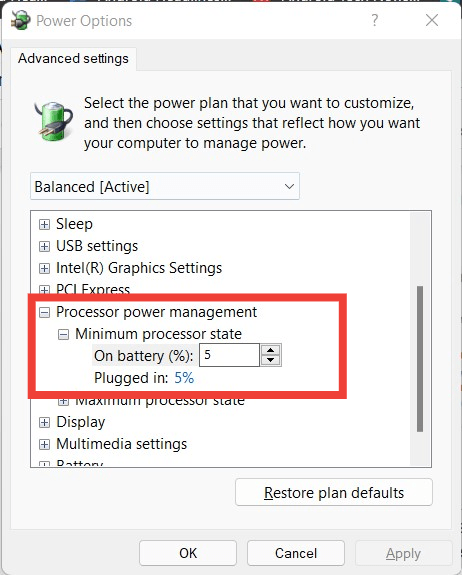
5. Change power management settings
Sometimes, using an aggressive power management plan can also automatically restart your Windows 11 machine when it reaches a certain battery level. To tweak this, you can change the battery power plan settings.
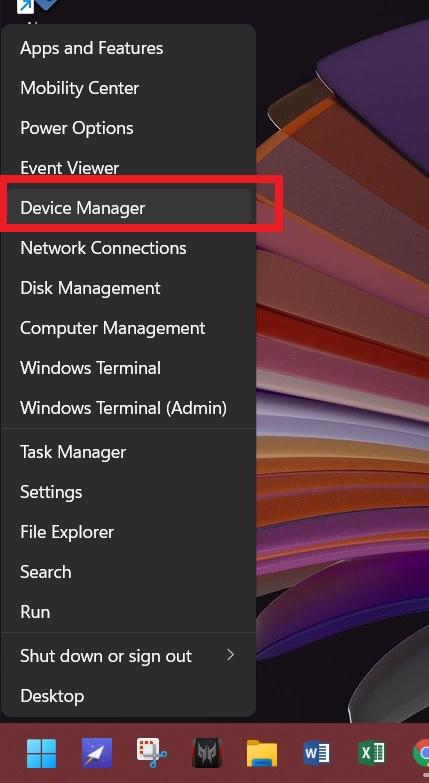
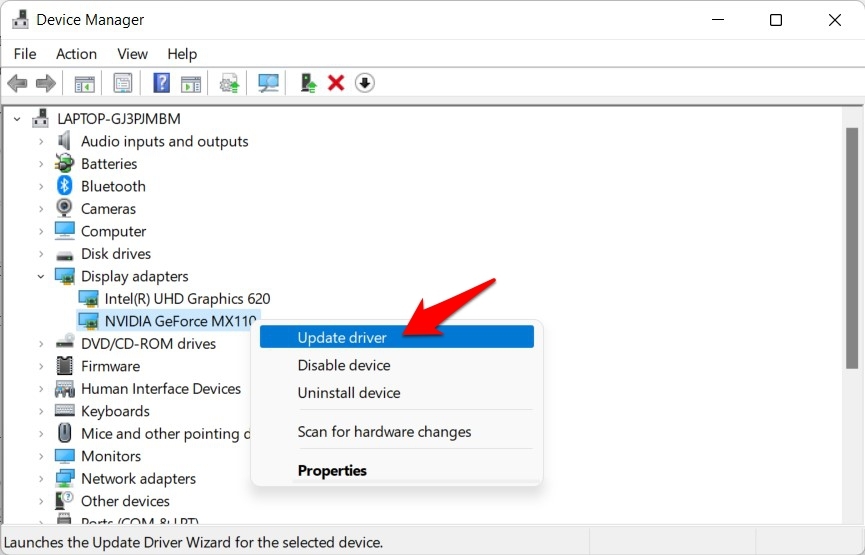
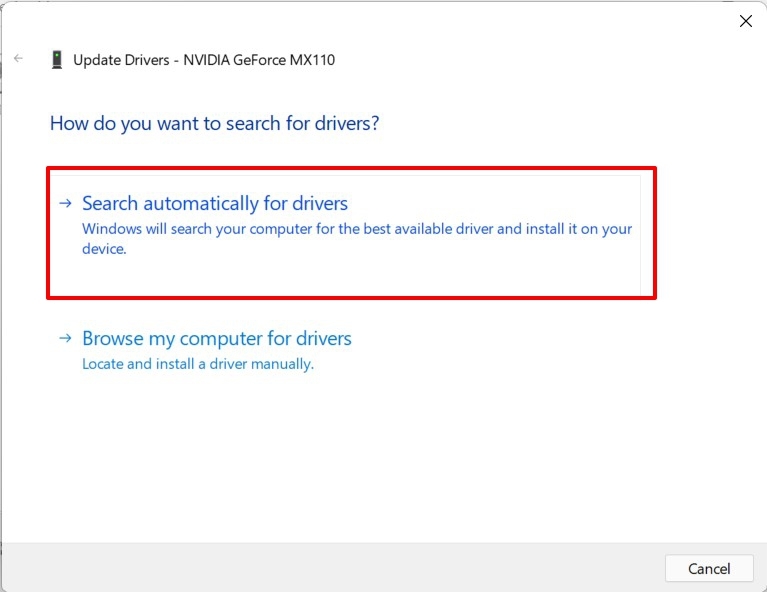
6. Update your Graphics driver
Old or incompatible graphics drivers could also be the reason behind the automatic restart of your Windows 11 machine. To fix this, you need to manually update the graphics driver, or at least check if you have the latest version installed.
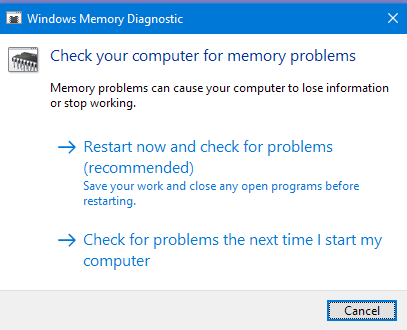
7. Run Windows Memory Diagnostic tool
If none of the above-mentioned tricks did the job in fixing the automatic restart issue on your Windows 11 machine, then as an alternative option you can run the Windows Memory Diagnostic tool. This helps to identify and possibly fix any memory-related issue that could be causing the problem.
8. Install a fresh Windows 11 copy
Well, if nothing works and you have reached till here in this guide, then as a last resort, you can go ahead with the installation of a fresh copy of Windows 11. Due to some missing files, your system may be entering the automatic restart loop. A fresh install will fix the issue by adding that missing file and hopefully fix the problem at hand. If you’ve any thoughts on How to Fix Windows 11 Automatically Restarting Issue?, then feel free to drop in below comment box. Also, please subscribe to our DigitBin YouTube channel for videos tutorials. Cheers!
How To Fix System Service Exception BSOD Error in Windows 11? Fix Google Search Not Loading in Chrome Browser Windows How to Fix WhatsApp Reconnecting Issue on iPhone?
Comment * Name * Email *

