Google Authorship has its presence from the year 2011. Many of us have used it successfully on our blog. But still, few bloggers cannot implement it due to some reasons. So I will point out some important facts to make the authorship claim easier. Google Authorship markup is for those who are serious about blogging and the web, not for those who are making blogging junkyard by doing copy-paste someone’s original content. It gives you an identity as a writer and links all your posts and content in search results if you do a little exercise, as mentioned later in this article. It prevents spam results in search queries and provides authentic results for a safe search. I can see it’s the future of web technology in terms of originality, copyright, and cc licenses. I warn you if you are not doing blogging as per DMCA policies, please don’t try to take benefit of Google authorship; otherwise, you may be a victim of cyber laws. So in this article, we will learn all about Google Authorship verification methods which are the easiest and most effective and give results fastest.
What is Google Authorship?
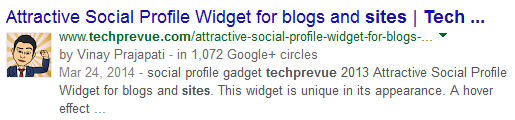
Google Authorship is to claim your blog or blog article. Google authorship is both for authors and publishers. After a successful claim, post the author’s picture, and the name appears with the article title and description in Google search results. For an Authorship claim, you must have an active Google+ account. Photo uploaded to Google Plus account will appear in search results. So you can change it from a Google+ account anytime. See the help image below. If you are doing guest posting or contributing to many blogs, you can claim authorship for your articles. Authorship is not about blog domain only. It is for post author or publisher. In search results, when your name appears, anyone can see all posts written by you with a single click. Similarly, by clicking on your profile picture, they can reach your Google+ profile. Google filters spam content after studying authorship claims, and you can also take advantage of copyright-related issues. It promotes original content development and makes social media more powerful in search engine optimization.
Need for Google Authorship
- After creating an author profile, you can use authorship markup to claim all of your blog posts in Google search results. 2. Google webmaster tools also have an Author stats option where you can see stats related to your blog posts. For example, it shows how often people searched for your blog post. Which post is most popular based on clicks. After the authorship claim, you can use Google webmaster tools for more details. 3. SEO analysts have noticed an increased click-through rate (CTR) on the post(s).
Signup for Google Authorship
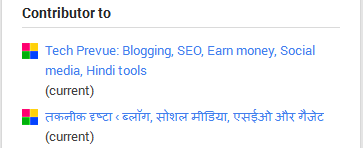
- For this, you must have an active Google Plus account. If you have, then please add me on Google plus +VinayPrajapati. 2. Please upload a perfect picture of yourself. If a face does not recognize correctly, your authorship will not be approved. 3. Now, add your blog to your Google profile page. See the help image below.
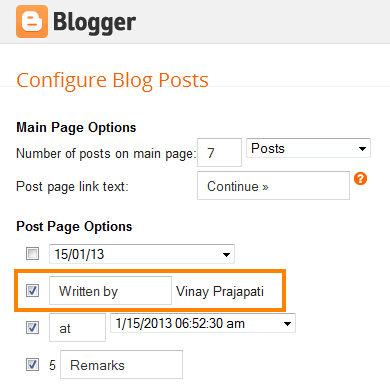
- If you have not yet switched to a Google profile and use a Blogger profile, it is highly recommended that you please switch to a Google profile right now. For more details, read this: How to switch to a Google+ profile. 5. Make sure the post author option checkbox is ticked with “by+Author Name.” See the help image below.
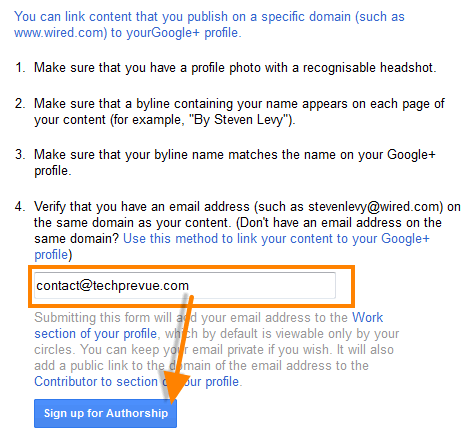
- If you are using a custom domain on blogger, you have verified the ownership of the domain by using domain email. You have to go to the Google Authorship page for this. See the help image below.
- If you contribute to some other blog, there’s an alternative method to claim authorship. You have to use your Google+ Profile link with rel= “author” attribute like this. or alternatively; Please change highlighted profile ID with yours. More help here: http://support.google.com/webmasters/bin/answer.py?hl=en&answer=1408986&expand=option2 After doing all that, you can see your picture and name as a post author in Google search results, and it may take the time of a few weeks. Meanwhile, you can use a rich snippet testing tool to remove Markup errors. Learn more here about fixing Blogger markup errors.